
Configuring alert thresholds for automated tests
Each TestNod project has its own alert configuration for performance regressions, test flakiness, skipped-test count creep, and failure rate spikes. The defaults are a reasonable starting point, and you can adjust them once you have a sense of how noisy each alert type is against your test runs.
Where to find the alert configuration
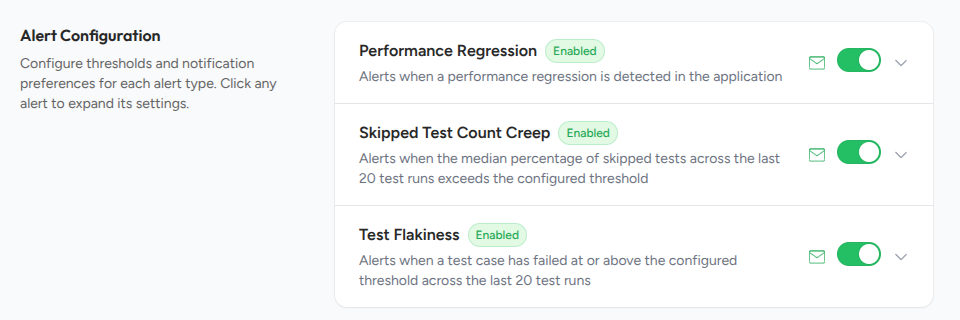
Open the project, then click Project Settings in the project header. Scroll down to the Alert Configuration section. The section lists each alert type as a collapsible row, and each row shows:
- Alert name and a short description of what the check looks for.
- Status badge that reads either "Enabled" or "Disabled".
- Email indicator showing whether you personally receive notifications for this alert type.
- Toggle switch to enable or disable the check for the project. The toggle only appears for admins.
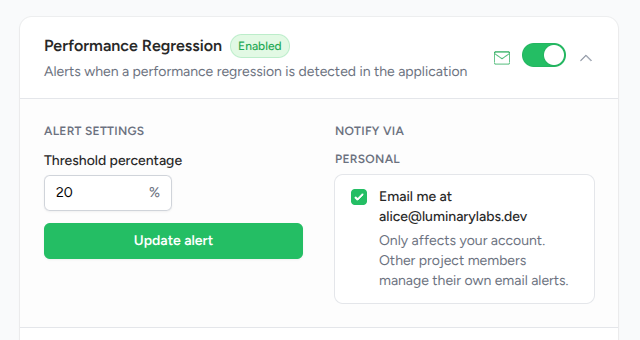
Click any row to expand it and reveal the threshold setting and your personal email preferences for that alert.
Who can change what
Alert configuration is admin-only for two actions: enabling or disabling an alert type for the project, and changing the threshold percentage. Members can view the configuration section and manage their own email preferences, but cannot toggle alerts or update thresholds. Resolving or dismissing an alert is also admin-only.
Members can still snooze and unsnooze any alert. Snoozing is a per-alert action managed from the alert detail page rather than from the configuration section.
Default alert thresholds and recommended ranges
Each alert type ships with a default threshold that works for most projects. You can adjust the threshold per project by expanding the alert row and entering a whole-number percentage between 1 and 100.
| Alert | Conservative | Default | Aggressive |
|---|---|---|---|
| Performance regression | 25% | 15% | 10% |
| Test flakiness | 50% | 30% | 15% |
| Skipped test count creep | 20% | 10% | 5% |
| Failure rate spike | 25 points | 15 points | 5 points |
Every alert type uses the same Threshold percentage field, so all four show a percent sign next to the number. Failure rate spike is the one type where the number is a gap rather than a rate. It sets how far above the recent average a run has to land before the alert fires, measured in percentage points.
A conservative setting produces fewer alerts and catches only clear-cut cases. An aggressive setting produces more alerts, including borderline cases that may turn out to be noise. Starting at the default is usually the right call. If you find yourself getting too many alerts, raise the threshold. If you're missing things you wish you'd caught, lower it.
Enabling, disabling, and snoozing alerts
Three different actions can quiet an alert, each with a different effect:
- Disable: Turns off the background check for the project. No events are created and no notifications are sent. Re-enabling resumes checking with the next test run. Disabling does not delete the alert's existing event history.
- Snooze: Keeps the check running and continues recording events, but suppresses email notifications until the snooze expires. Use snooze when you want to silence an alert temporarily without losing the data. See Snooze, resolve, dismiss for the full list of snooze durations.
- Opt out of email: Stops only your personal notifications for that alert type on that project. Other team members continue to receive their notifications as configured.
What the configuration section does not control
A few alert behaviors are set globally and cannot be adjusted from the configuration section:
- Notification recipients are managed by each user from their notification preferences page.
- Notification cooldown is fixed at 24 hours per alert. After a notification fires, the next notification for the same alert waits at least 24 hours, even if more events are recorded in that window.
- Comparison window is fixed at the last 20 same-tag test runs. Each check needs at least 20 runs of matching history before it can fire.